
How to Wash a Down Sleeping Bag

The chickens guard my drying sleeping bag.
It is a great time of year to wash your sleeping bag. If you’ve just finished a thru-hike or are putting your summer bag away from the season, taking the time to clean out some of the dirt, oils, and smells can extend the life of your bag. Washing your bag can also restore loft and add warmth to your sleep system if you’re still planning to hit the trails in the fall. Do not dry clean your down sleeping bag! Some companies, like Feathered Friends, offer downwashing services (which I’ve never used) or you can go to a laundry mat and use a clean and nick-free front loading washer and dryer. Handwashing is the least expensive route (which is good, since a summer of thru-hiking is known to wipe out bank accounts). I also find it a cathartic exercise way to commune with my sleeping bag one last time after a thru-hike. Washing a bag is easy to do, but can be a bit intimidating at first. You will see your precious bag looking sloppy and soaking, which can be a bit like seeing a loved one down in the dumps. But don’t worry! Your bag will be better than new with a little care and these easy steps! Step by Step Instructions for Handwashing Your Sleeping Bag: Note this process can easily take 5 hours so if you are using a Laundromat, make sure that it is not near closing hours. Bring a book and expect to hang out for a while. Always use a down-specific wash. I like Nikwax Downwash or McNett Revivex Down Cleaner. Check your bag before hand for nicks and tears. If there are any, use Gear Aid Tenacious Tape or duct tape to seal up holes. Most sleeping bag companies like Western Mountaineering *require* you to wash a bag before sending it in for repairs.

Spot clean stains beforehand
Spot clean stains from your bag by first nudging down away from the area you need to clean so you are only treating the shell. Use a few drops of your down wash and a clean towel to gently scrub away the stain. Wipe away residual soap with a moist towel.
Put about 5 inches of warm but not hot water into a bathtub.
Add about 3 oz of downwash to the tub.

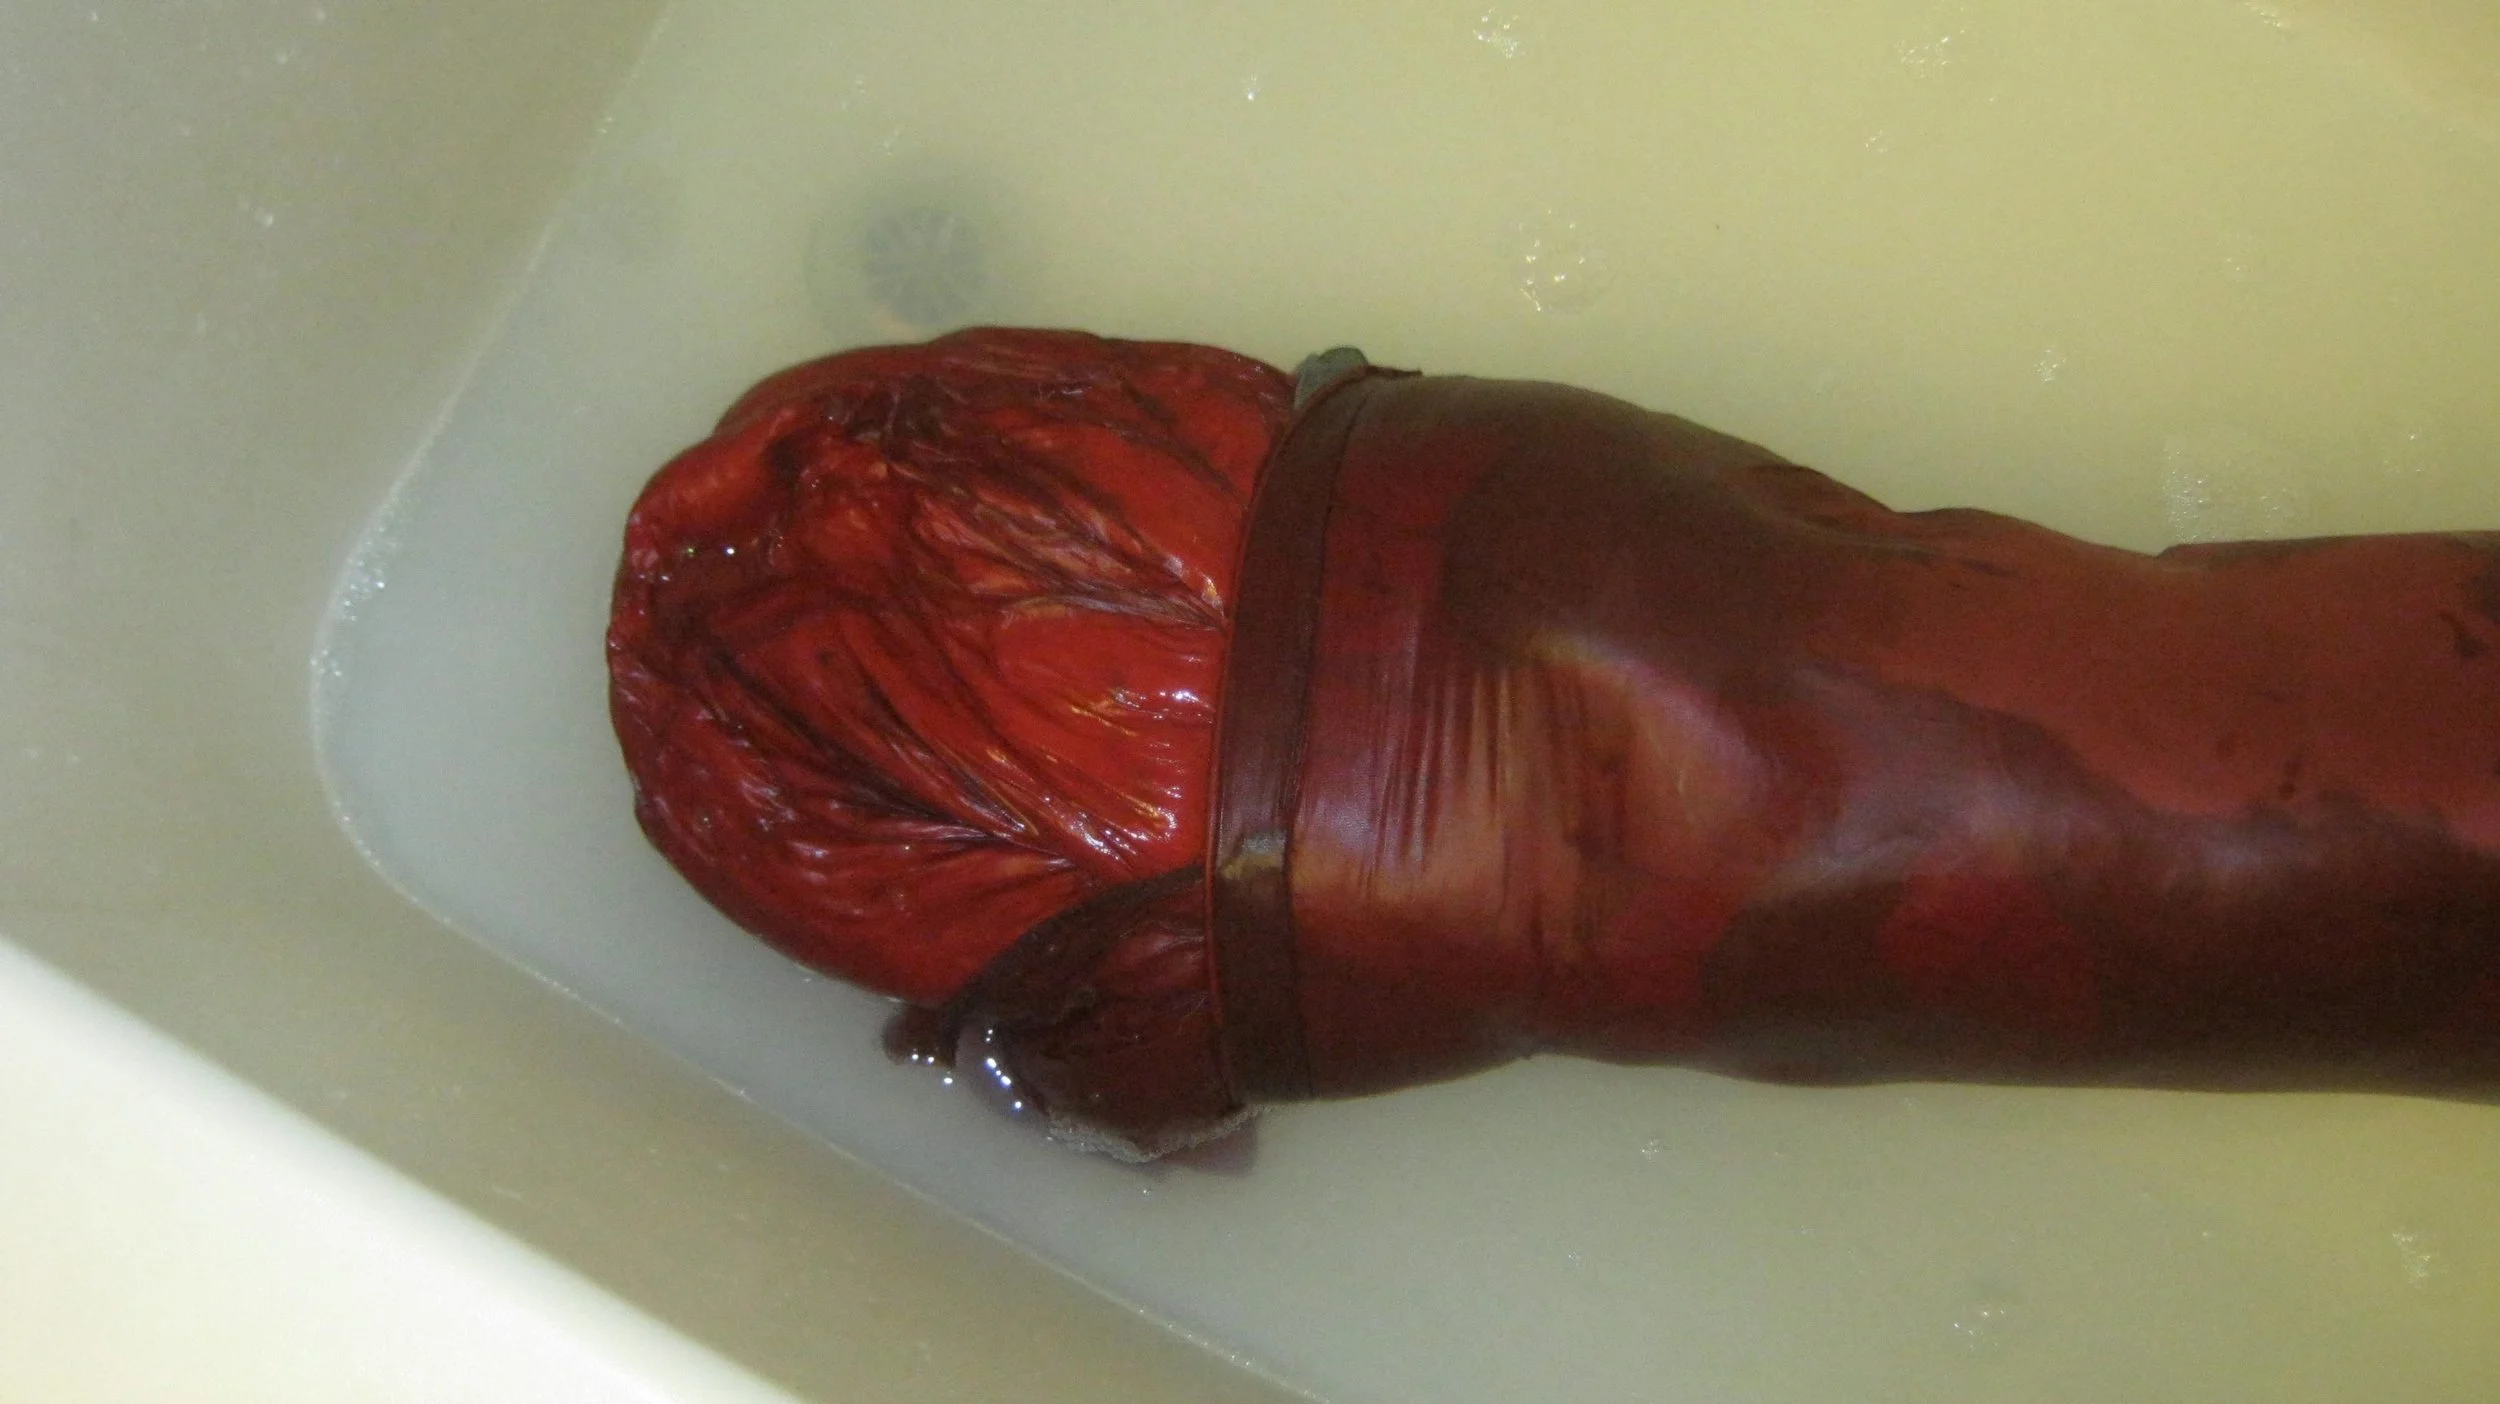
4. Put your sleeping bag in a stuffsack (non-waterproof works better) and submerge the stuffed sleeping bag into the water. This takes the air out of your bag and prevents inflated baffles from making your bag float.

Put the whole stuff sack straight into the water
5. Slowly pull the bag from the stuff sack. Bit by bit, knead the soapy water through each portion you remove before pulling out another section.
Slowly pull out sections of the bag from the stuff sack, working the soapy water through each new section
6. Be careful when kneading and work slowly when baffles fill with air. If a baffle becomes inflated, be mindful that quick movement can pop your bag, either in the internal baffles or the external shell.

Be careful not to pop your baffles as air bubbles can form
7. If you flip the bag over at any time, use both hands and be aware that your bag will be much heavier than usual because it is filled with water. If done incorrectly, you may tear your bag’s liner. Use both hands. Note that newer bags, bags treated recently with DWR (Durable Water Resistant), or bags filled with DryDown may require a little extra effort to become thoroughly worked into your bag.

Change the soapy water multiple times.
8. Change the soapy water five or more times until the water is no longer brown or bubbly.
9. When the water runs clean, drain the tub with your bag still in it. Then roll your bag slowly to drain water. Do not ring your bag as it can cause down clumps, which are hard to dry.
10. Lift your bag using both hands and carry to a dryer. I use a laundry bucket in between to reduce stress on the fabric.
Drying your sleeping bag in a dryer

Put your wet, sopping, and pathetic looking down into a FRONT LOADING dryer
Find the biggest front loading dryer you can. The dryer should have heat control and a no heat setting. Check the dryer for nicks and burrs or sharp objects using both your eyes and hands.
Throw some tennis balls in the dryer to break up down clumps. If you’re in a small trail town and are looking for tennis balls to dry your bag, note that some grocery stores, like the City Market in Pagosa Springs, CO, sell tennis balls.
Set the temperature for the dryer for very low or air dry. Excessive heat can melt the shell’s bag.
When your bag looks dry, pull it out and manually break up any down clumps you still feel in the bag. Then put it back in the dryer for even more time.
When the bag looks really dry, check for down clumps again. Still there? Just a small one is there? Keep drying! Dry that bag until there is not a single down clump left.
Note: As a baseline, My Western Mountaineering Ultralite (3 season, 29 oz bag) takes about 3.5 hours to dry. My Brooks Range 15 degree Cloak (3 season, 20 oz quilt) takes about 3 hours to dry.
When it is done, find a dry place to airloft the bag. I like to put mine in the California sun for half a day for lofting in dry heat, but if you live someplace humid or the sun isn’t available to you, indoors should work OK.
Store your bag in a large, loose fitting cotton bag until your next adventure!
Trackbacks/Pingbacks
ZPacks Solo Down Sleeping Bag 10F Review - […] It is fluffy. There’s no shortage of loft in this bag. It was recently seeming flatter than usual. I…
ZPacks Solo Down Sleeping Bag 10F Review - Appalachian Trail Girl - […] It is fluffy. There’s no shortage of loft in this bag. It was recently seeming flatter than usual. I…